Here's what I use. Some of these things are optional or replaceable. You certainly don't need to go buy an overhead projector to make these things.
bleach
poster board
projector
spray bottle
a thick marker
dark shirt
packing tape
x-axcto knife/boxcutter
repositionable spray adhesive
Before we start, some stuff you should know before you start. You're using bleach to lighten areas of the shirt that aren't covered. In this guide I'll be making a stencil of Nightwing. I'm using an image by George Perez from the New Teen Titans. When I make the stencil, I want the outline of the character to be dark on the shirt, right? So I have to cut out the areas that will be light. Keep this in mind when you're figuring out what to cut out. Also, you want all the parts you are keeping to be connected. You'll see an example later.
I hear bleach only works on natural fibres? Not sure. I always make sure my shirts are at least 50% cotton, which really isn't very hard. I usually come across 100%. And also, because you're using bleach you will need a fairly dark coloured shirt. So far I've only used dark blue, black and a dark purple. I can't say how anything lighter than that works. I have a red shirt I want to use, so eventually I'll have that info. Until then...
When I started, I figured the bleach would just make every part it touched a lighter version of the shirt's colour. Wrong! Maybe it's just the shirts I've used, but I've gotten a variety of things. I've used black and gotten off white in one case, and in two others I've gotten a brown-ish red. When I did the purple it turned bright pink. Blue has turned a pinkish red. It's often a pleasent surprise.
Some examples of stencils I've done for shirts:
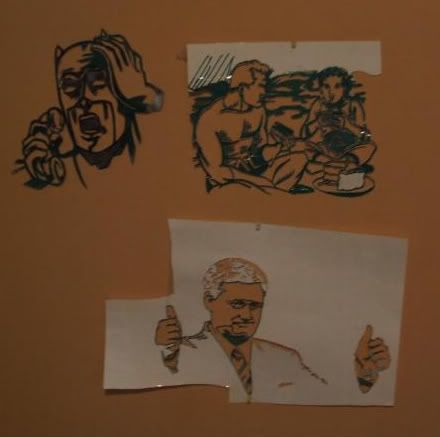
We have Batman, Aquaman and Aqualad eating cake, and Canadian Prime Minister Stephen Harper. You can see how different each one is. I'll be referencing them in my guide. Now, let's get to it!
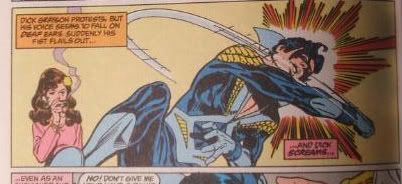
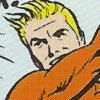
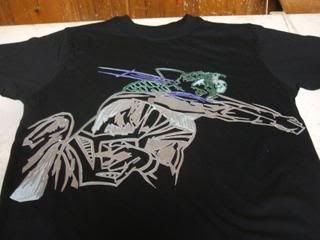
1. First step is the easiest: pick your image. Some images are better than others, taste aside, and you'll see why as you continue reading. The image I chose:
You can pick pretty much whatever you want; comic art, a photograph, your own drawing, whatever. Photographs usually require some editing to get into a format you can stencil. Basically, use any fairly good image editing program, get rid of all saturation and bump up the contrast a bit. Realize that the easiest picture to stencil is one that has 2 main shades - black and white. I used this method on Stephen Harper. Generally speaking photographs are harder to work with. You'll see at step 3.
2. Now you have to take your image and transfer it to the poster board, but make it bigger. If you aren't very artistic, don't worry, you don't have to draw it. You can increase the size digitally, although I'm not an expert at doing it this way. But increase the size, print it off and stick the image to the poster board.
What I usually do is use a projector. I trace the image onto a piece of that clear projector paper and project it onto the poster board.
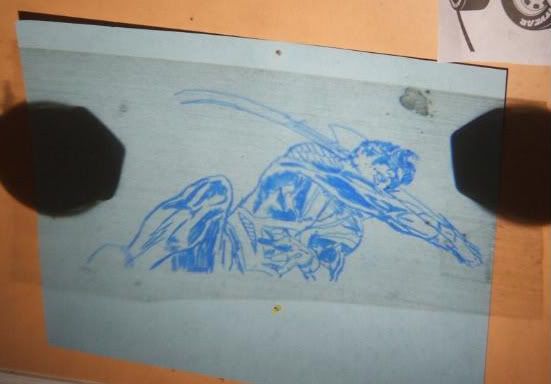
Then I draw it out with a pencil.
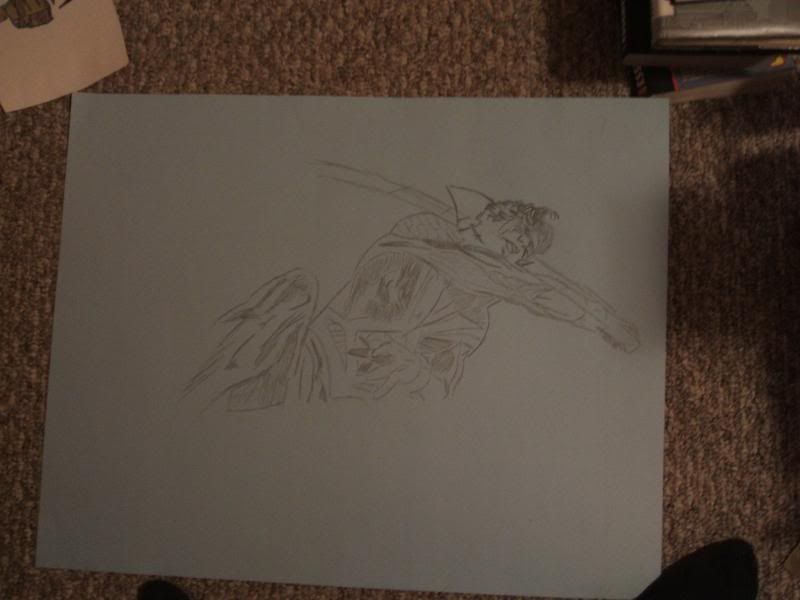
The larger you make the image, generally the easier it is. You want lines that are fairly thick so it can support its own weight.
3. Now I touch up the image. Often what I do in pencil is messy and the lines aren't completely clear. That's just because I'm lazy. You can combine this and the last step, although there is some thinking involved at this point. This is also where you can see why some images are better than others.
When making a stencil, you want everything connected. Say you have an image of a face. Take this picture of Aquaman:
The eye on the right is floating - its lines are not attached to any others. In this case it's fairly fixable, you just have to extend the lines a bit. Same goes for the nose. However, some pictures just don't work. There are other ways around it. If you look at the Stephen Harper stencil at the top, I used a few lines on the jaw to connect stuff. And the great thing is taking these liberties doesn't really hurt the final product, as long as you strategically place them. But the easiest thing to do is pick a picture that works well in the first place.

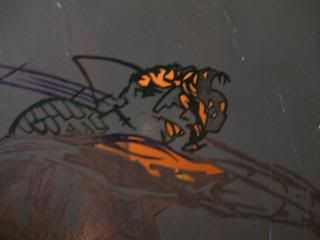
Here's Nightwing touched up. I used a few markers. The different colours don't mean anything. I just ran out ink a couple times. My rule of thumb is to have every line at least the width of a my Sharpie's tip. It's better to go even thicker though. I also made some areas too weak, so later on I had to go touch them up with duct tape.
4. The next step is covering your posterboard with clear packing tape. This is to keep bleach from soaking into it. There are alternatives. You can find material that is thin, water proof and cuts well. I haven't come across this yet, so I just do this. On the Batman stencil above I covered the posterboard in duct tape and then drew the design, but the marker tends to rub off when you tape it first.
5. Cut it out. Always keep in mind which spaces you are cutting. Once you make a mistake it's hard to correct. This is the longest stage.
I often hold up my picture to check how it's coming along.

You can see in the above photo that I extended the lip line to connect with the mouth.
I advise doing the small parts first. Once you cut out big chunks the paper loses a lot of its sturdiness.
6. After a lot of work the stencil is done!
I ended up making one small touch up after this, but this is pretty much it. I cut small pieces of duct tape to support a couple parts. There is one between the outline of the arm and the shadow of the arm. There's another holding the outline of the leg and a shadow on the leg. They aren't noticiable at all. If your stencil is a bit wobbly, make some small duct tape bridges.
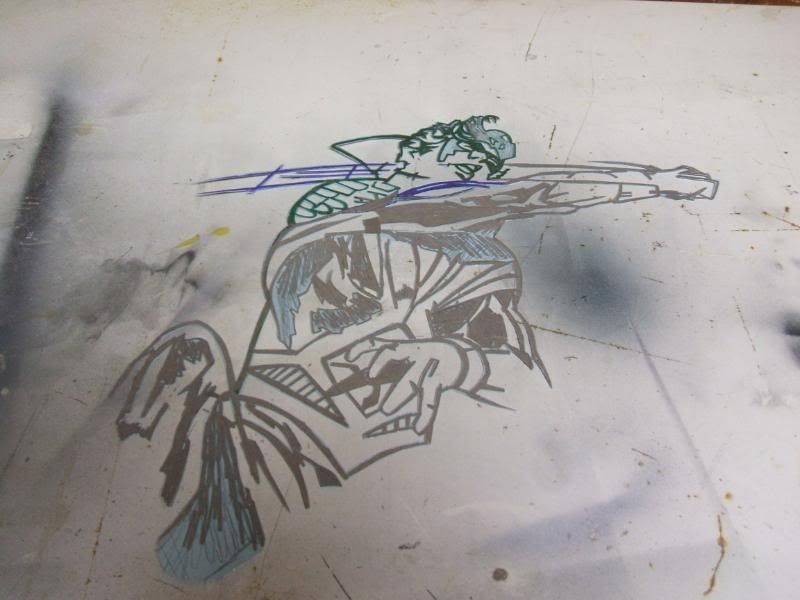
Now you set up your spray station.
Lay the shirt flat on a dust free surface. Have paper towel ready. Rip off 3 or 4 sheets. You want the area to be well ventilated, or use a respirator. Bleach fumes aren't good. You also want to wear rubber gloves. Covering the area is probably a good idea. I use aluminum foil when I do.
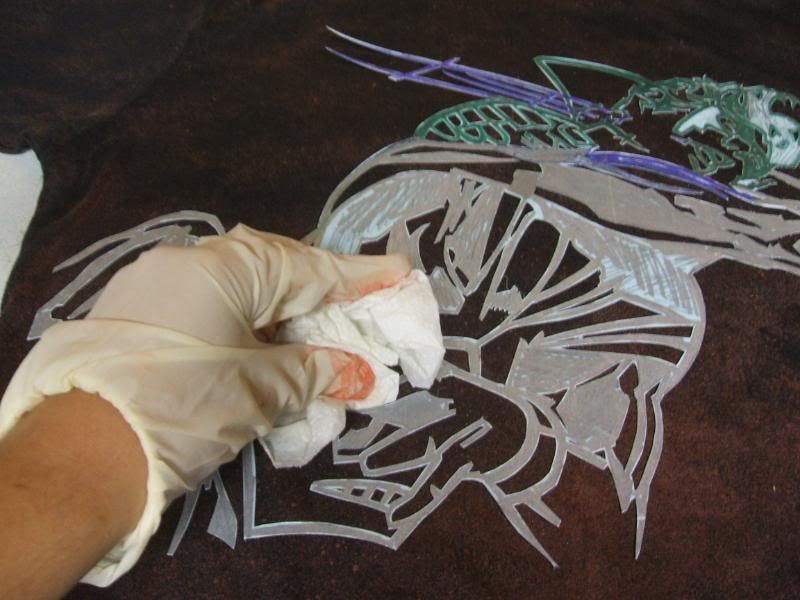
Dry place your stencil on the shirt. When you've got a good idea for where it should go, take it off and spray the back with the adhesive. Now place it back on the shirt and make sure all the small parts are stuck down. If you have something like the Aquaman stencil or the Stephen Harper stencil you will need aluminum foil to cover the areas of the shirt you don't want to spray. You don't want square edges where the poster board ends.
Here's Nightwing placed on the shirt:
7. Time to spray. Have your gloves on and paper towel at the ready. Do a couple test spray with the bottle in a sink to make sure it's set to mist. When you're ready, so 1-2 even sprays over the stencil. Don't go overboard. You won't see an effect right away.
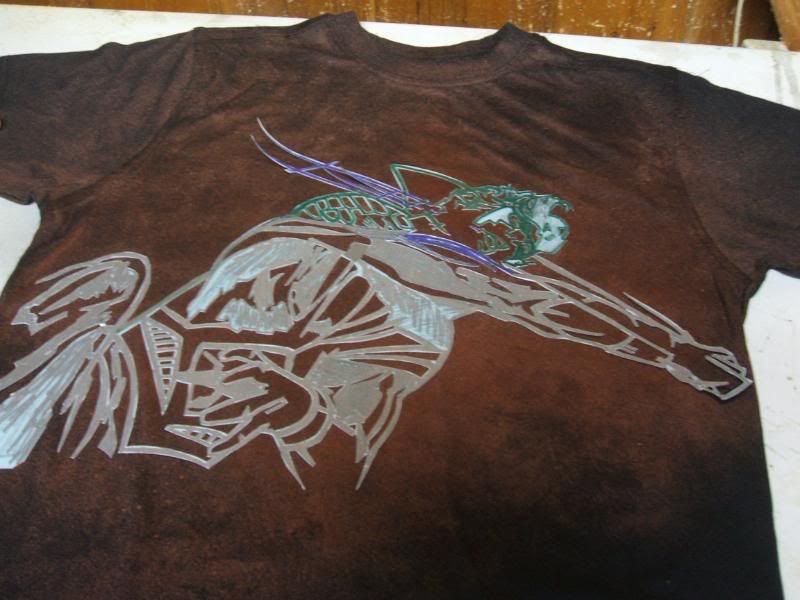
Dab the shirt and stencil with a paper towel. You don't want the bleach to soak into the fabric. The picture below is after one round of spraying.
After 2 rounds:
And that's where I stopped. As time goes on it will become brighter. You can leave the stencil in place and spray more if it isn't light enough for you. But you can't go back, so don't rush it.
8. When you are happy with the colour, make sure there is no excess bleach on the stencil! If you remove the stencil and there's some on it you'll get drips, and you don't want that. Carefully remove the stencil and enjoy!
The finished product:
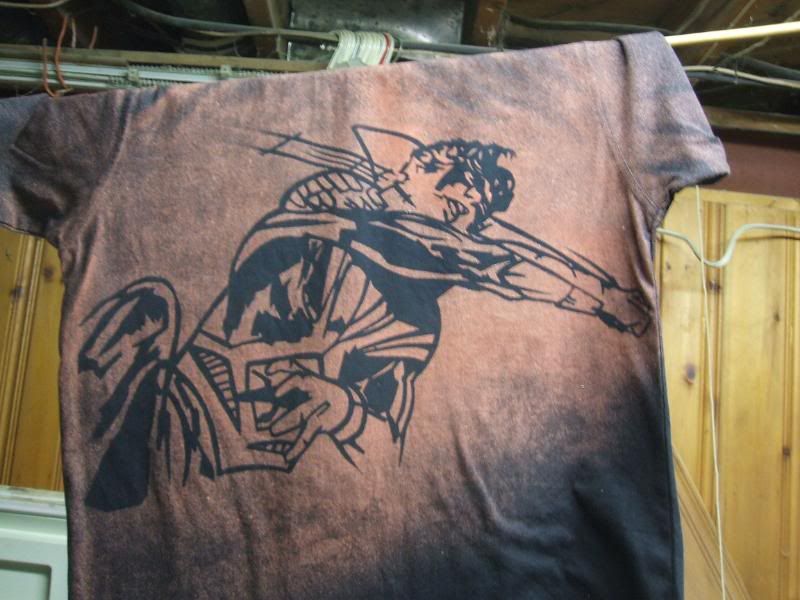
Pretty cool, huh? It's gotten a bit brighter than that. Like I said, it takes a bit of time. Now, I've heard you should stick your newly made shirt in the drier before getting it wet. I always wait for the shirt to completely dry, stick it in the drier for a bit, rinse it in a sink, then stick it back in the drier. And of course it's much better if you do that in bulk to save on electricity.
It takes a bit of time, but you get a cool, one of a kind shirt for very cheap. It cost me $2.50 for the shirt and less than $10 for all the materials, and they last a long time. The main expense was the adhesive (but don't skimp on buying that, it's what gives you the crisp lines!).
Hope this comes in handy and you enjoy making your own shirts. If you have any questions feel free to ask in the comments.